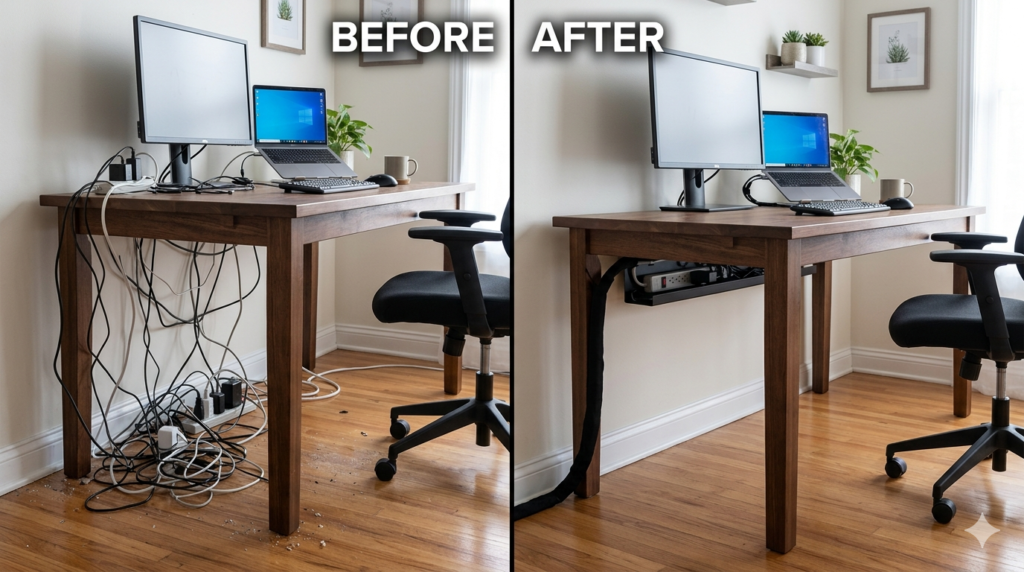
Psychological studies consistently show that visual clutter translates directly into cognitive overload. When you sit down at your desk and see a tangled web of black cords dangling by your feet, it subtly drains your focus before the workday even begins. Beyond aesthetics, uncontrolled wires are dust traps and genuine safety risks that can damage expensive equipment if accidentally caught by a foot.
If your workspace looks like a server room explosion, you need a systematic approach to cord organization. Tucking a few wires behind a monitor is a temporary fix, not a solution.
This comprehensive cable management guide is designed to walk you through the precise steps required to tame the chaos, eliminate trip hazards, and foster the mental clarity that comes from a perfectly organized environment.
What is Workspace Cable Management?
Workspace cable management is the systematic organization and concealment of electrical and data cords. It involves routing wires along structural furniture lines, elevating power strips off the floor, and bundling slack to prevent trip hazards, protect equipment, and maintain a functional, clean aesthetic.
Step 1: The Total Disconnect and Audit
The biggest mistake people make is trying to organize cables while they are still plugged in. This is physically frustrating and limits your routing options. To do this right, you must start with a blank slate.
- Power down: Turn off your PC, monitors, and peripherals.
- Unplug everything: Disconnect every single cord from both the wall and the devices.
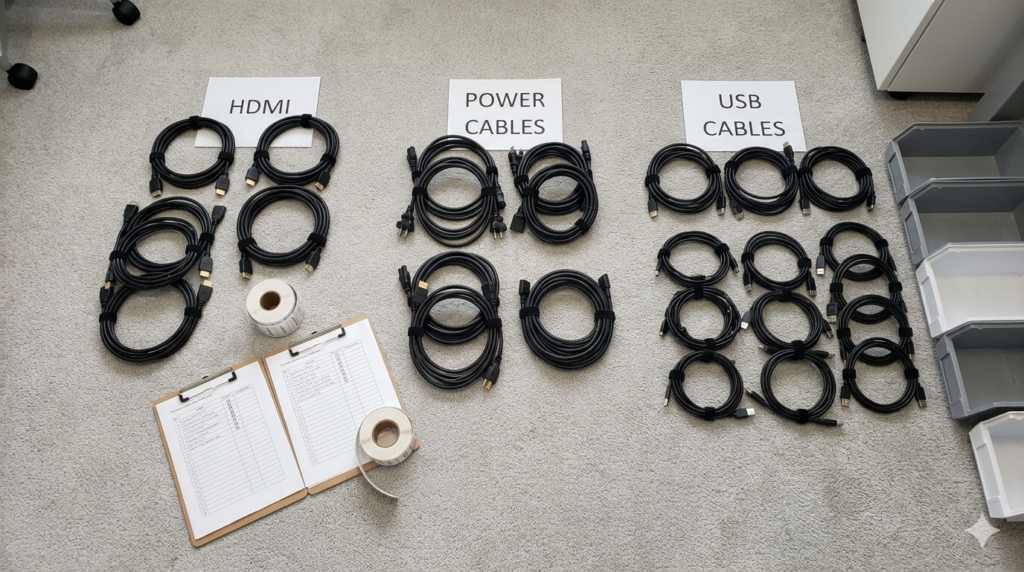
- Audit and untangle: Lay all your cables out on the floor. Group them by category (power cables, display cables, USB peripherals).
This step allows you to identify cables that are unnecessarily long or obsolete cords you no longer need, immediately reducing volume.
Step 2: Establish Your Power Hub
The secret to a clean aesthetic is ensuring that only one single wire—the main power strip cord—runs from your desk down to the wall outlet. Every other wire should be contained within the desk structure itself.
To achieve this, you must mount your power strip to the underside of your desk.
By installing a sturdy under-desk tray, you create a hidden shelf specifically designed to hold heavy power bricks and surge protectors. Place your power strip inside the tray and plug your monitors and PC directly into it. This instantly lifts 90% of the clutter off the floor, eliminating the primary trip hazards and making it infinitely easier to vacuum your office.
Step 3: Route, Bundle, and Conceal
Once your power hub is established, it is time to plug your devices back in. Start with the thickest cables first (like monitor power cords) and move to the thinnest (like webcam USBs).
As you route the cords along the back edge of your desk or down a monitor arm, group them together. Running cables in a single, thick channel looks infinitely better than having six separate wires draping in different directions.
To keep these channels tight and secure, firmly bind the slack together every few inches. Using reusable, flexible fasteners allows you to easily add or remove a single wire later without cutting through rigid plastics.
The Psychological Impact of a Clean Setup
Completing this process does more than just protect your electronics. As detailed in The Ultimate Ergonomic Desk Setup Guide: Measurements & Rules, a workspace should minimize physical and mental friction.
When you sit down and stretch your legs without hitting a power brick, and when you look behind your monitors and see nothing but empty space, your brain registers the environment as calm and controlled. This visual quietness allows you to direct 100% of your cognitive energy toward your work.
Conclusion
Mastering the art of cord organization is a crucial step in building a professional home office. By committing to a complete tear-down, utilizing an under-desk tray for power, and methodically bundling your wires, you can permanently solve the issue of desk clutter. Keep this cable management guide handy whenever you add new hardware to your setup, and remember that a clean aesthetic is the foundation of a focused, productive mind.
Frequently Asked Questions (FAQ)
How do I hide cables without drilling holes in my desk?
If you cannot drill into your desk, you can use adhesive cable clips and heavy-duty double-sided mounting tape to attach power strips and routing channels directly to the underside of the desk surface.
What is the best way to manage cables on a glass desk?
Glass desks lack an opaque underside to hide an under-desk tray. The best approach is to use cable sleeves to bundle all wires into one thick “umbilical cord” and route it straight down a desk leg using adhesive clips or zip ties.
How do you hide monitor wires?
Route monitor wires directly down the back of the monitor stand or arm. Most modern monitor arms come with built-in plastic channels specifically designed to conceal display and power cables from sight.
Is it safe to zip-tie power cables tightly?
While you can bundle power cables, you should avoid cinching plastic zip-ties so tightly that they pinch or deform the protective outer jacket of the wire. This can damage internal shielding. Reusable fabric ties are generally safer as they provide a gentler hold.